Receiving Payments
The Receive Account Payments screen allows you to process payments for account sales, which may originate from individual customers or a master entity trading as a company. Follow these steps to successfully receive and allocate payments:
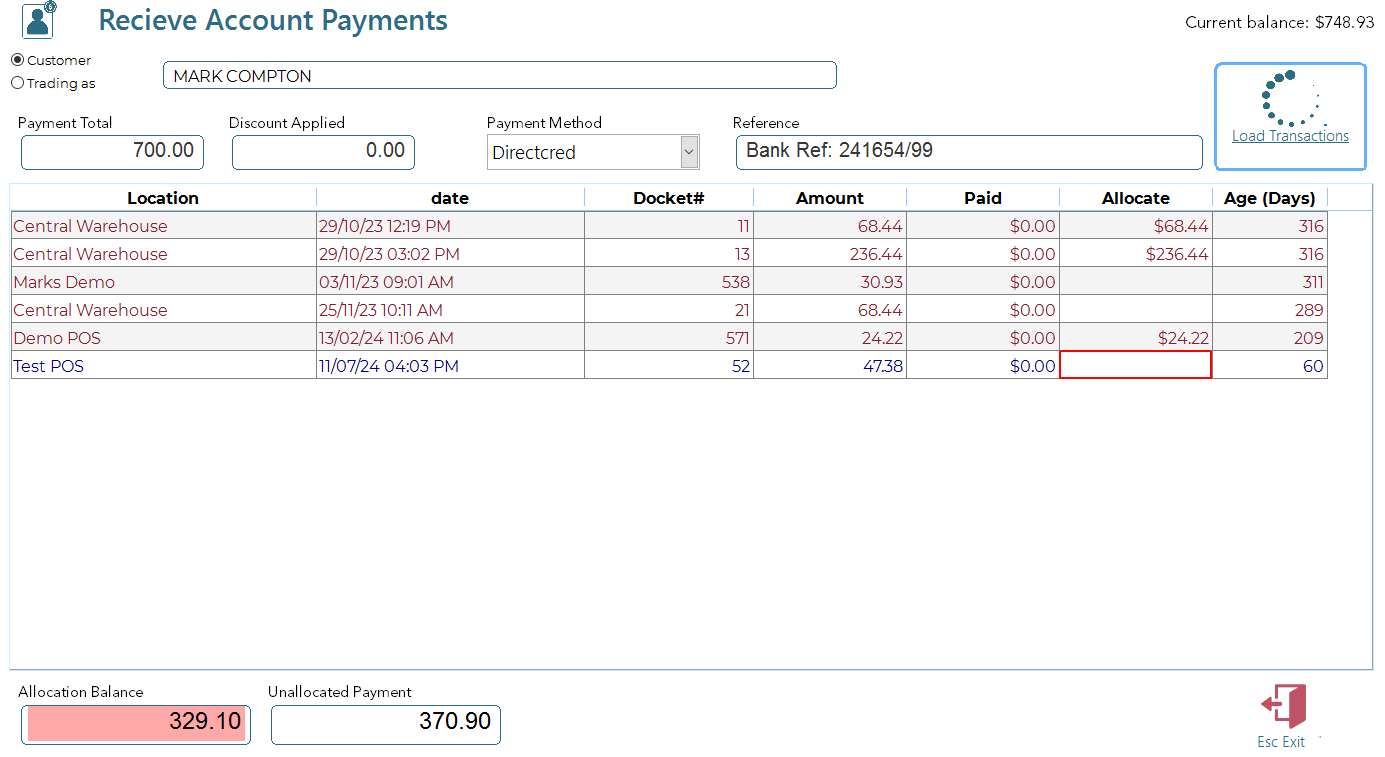
To receive a payment
- Select Entity Type - Choose whether the payment is for an Individual Customer or a TradeAs Entity.
- Search for Customer/Entity
- Type all or part of the customer/entity name. The system will locate the correct entity.
- If there are multiple matching records, a search grid will appear for you to select the correct one.
- To view all possible matches, enter a `?`.
- Enter Total Payment - Input the total payment amount being received.
- Enter Discounts (Optional) - Optionally, enter any discounts applied after the sale. These could include charges applied by the trading company or other adjustments.
- Select Payment Method - Choose the payment method from the drop-down box.
- Enter Reference (Optional) - Optionally, enter a reference number. This will be stamped on the payment for future reference.
- Load Transactions - Click <<Load Transactions>>. All qualifying transactions will be displayed in the grid.
- Allocate Payments
- Enter the payment amounts for each transaction in the "Allocate" column.
- Ensure the "Allocation Balance" field turns green, indicating that the allocations balance the total payment amount.
- Save Allocations - Once the allocations are balanced, the <<Save>> button will appear. Click "Save" to apply the allocated payments.
- Payment Summary (Optional) - The system will ask if you want a payment summary. You can choose to view or print this summary for your records.
Additional Tips
- Ensure Accuracy: Double-check all entries before saving to ensure accuracy.
- Use Reference Numbers: Utilise the reference field for better tracking and future reference.
- Discounts and Adjustments: Properly account for any post-sale discounts or charges to maintain accurate records.