StockTake
Operations/Stocktake
Ramsys allows you to stocktake all or any subset of a store.
If an item is in the stocktake and you do not count it then it will be considered a zero count and will set the onhand to 0
All modifications to qty onhand are processed as an adjustment of the type Stocktake. This is one collective adjustment however as Ramsys runs on a fully relational database data may at any time be broken down and reported by Stock item, Supplier, Attribute etc
The basic procedure is:
Step 1 – Generate a stock take, print the stock take list report : this will tell you the quantity Ramsys has in stock
Step 2 – Count the items that you have in stock : this will tell you what the ACTUAL quantity is
Step 3 – Update the stock take report in Ramsys : this will adjust any differences between 1 & 2
The stock take report generated in Step 1 is a “snapshot as at a given time”. The validity (i.e. accuracy and simplicity) of a stock take therefore depends on making the ACTUAL count as close as possible to the time that the snapshot was generated.
The critical issues, errors and inconsistencies of doing a stock take all evolve around any time delays that may occur between steps 1 & 2. It is only stock movements that happen AFTER step 1 and BEFORE step 2 that cause headaches. They must be adjusted accordingly.
Every effort must be made to ensure that the timing of those two steps is as close together as possible to avoid the need for adjustments.
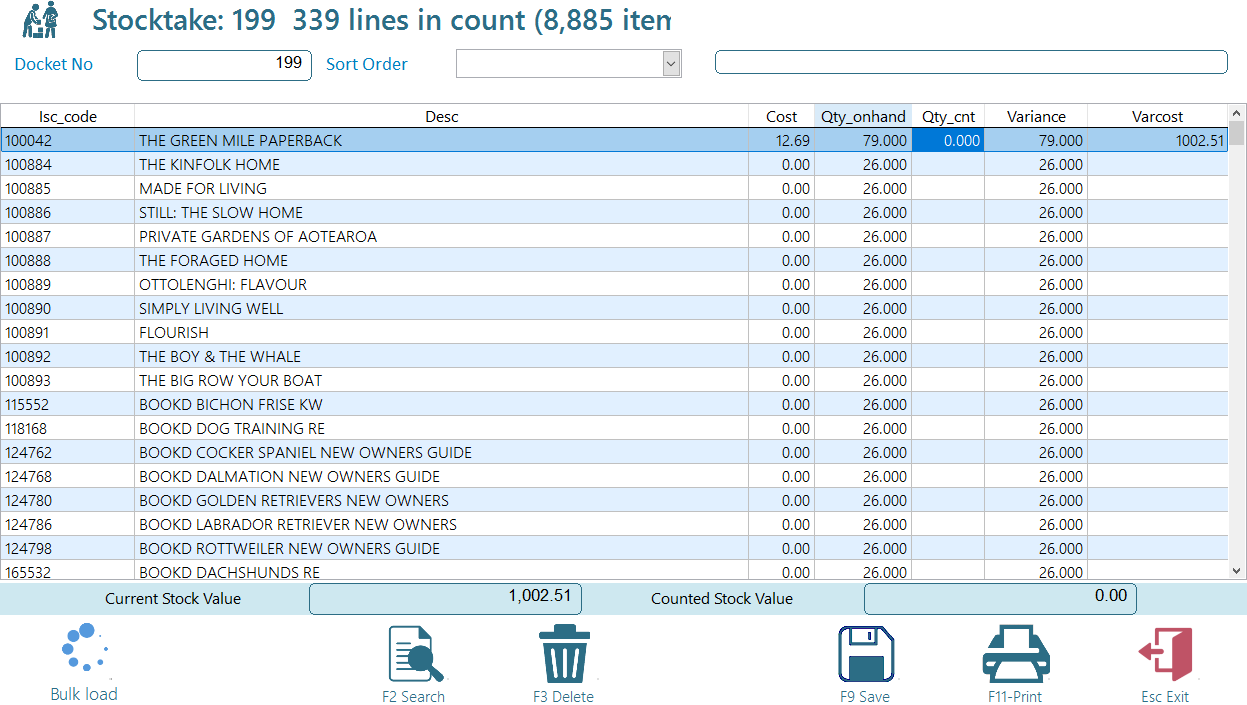
The Ramsys Stock take Screen
Warning : You cannot create a new stocktake for items that are included in another stocktake that is still open. You will need to delete or 'close' the existing stocktake. The system will advise the stocktake numbers and prevent you adding the new stocktake until these are resolved.
You may at any time create a stocktake for a series of items or all of the items in the database.
From the Operations Menu, select Stock take and login to the process window. (You will need the appropriate Security level)
If you are working with an earlier stock take, you can search for and select it using <F2>.
Creating a New Stocktake
To create a new stock take, press <Enter> and you will be asked if you want to create a new one –press “Y”.
You may filter the stocktake by selecting a supplier, style, promo or any combination of attributes from the drop down boxes.
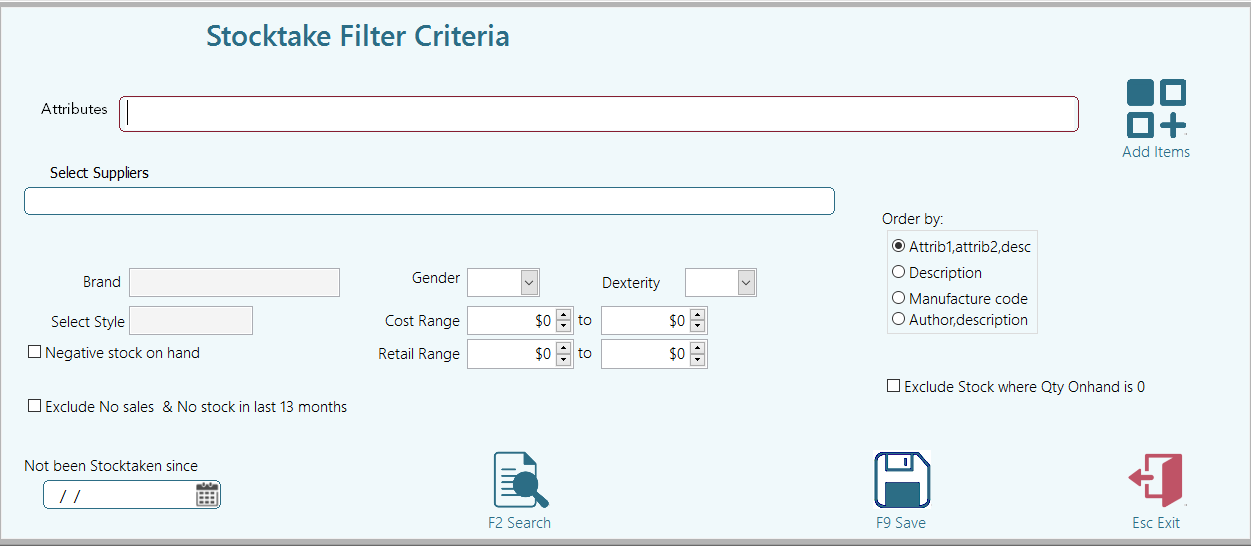
To create a FULL stocktake simply click save, leaving all fields empty and the system will generate a stocktake docket containing a full list of items.
A stocktake docket contains a "snapshot" of quantities on hand – at that time - for the items selected.
Once the list (snapshot) is on screen press <F9>.
Depending on the method you will be using you will progress in one of three ways
You will be asked if you want to print a stock sheet
Items already in an open stocktake
The system is designed to prevent potential counting issues by notifying you of any open stocktakes. While you can have multiple open stocktakes, the system ensures that a specific item is only included in one open stocktake at a time. This prevents user confusion and helps maintain accurate counts.
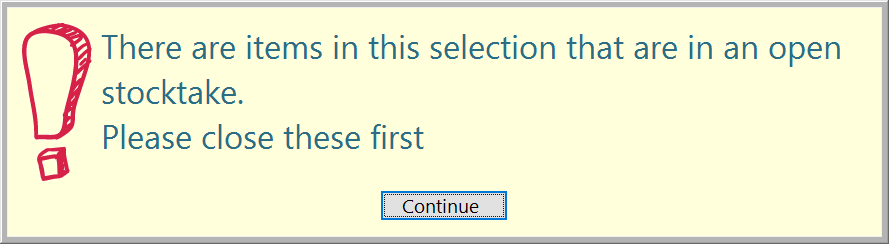
If this occurs please deal with the open stocktake by closing or deleting it. The system will advise you which stocktakes are the cause of the issue.
Manual Count
Print this report and record the counts onto this sheet. These will have to be entered manually into the system.
Once you have selected the stocktake docket, enter the counts into the grid for and, when complete press <F9> to save and close the stocktake.
(This time select "Yes" on the "Update Levels" window and all stock levels for items in this stocktake will be updated and the stocktake docket will be closed).
Bluetooth Scanner
(Scanner must be a bluetooth interface unit with inbuilt memory)
Please consult the Appendix in this manual Bluetooth scanner programming

If you are not entering counts at this point, then say "no" to the next window which asks "Do You wish to Update the Stock Levels?"
You may at any time recall this stocktake by entering the stocktake docket number or press <F2> to bring up the list of Stocktakes.
Remember: Do not update a stocktake until you have entered the actual counts for each item.
Once the stocktake docket is on the screen click on the "Load Count" button and put the scanner into the scanner cradle (See section on using Handheld Scanners). The counts will load as if entered by hand.
NOTE: In both methods of entering a count, you will see that where a count quantity is different from the snapshot quantity, the item line will show ‘red’ to highlight the fact that the quantities are different.
When you save the stocktake you will be asked if you wish to print the stocktake docket. This will allow you to select from 2 different types
1. Incorrect items only - Only the items with incorrect counts will be printed.
2. All items - All items in the list will be printed.
Note the report will show any returns made since the last stocktake as these are the major cause of stocktake errors.
You will now update the stock levels to record the actual counts into the system.
Opticon Scanner
Unclosed Stocktakes
Unclosed stocktakes will appear on your areas requiring attention report. To 'clear' them from this report, go to Operations > Stocktake, locate the stocktake docket and either
1. Complete the stocktake (enter the actual counts) or,
2. Delete the stocktake - select <F3 - Delete>
Hint: When searching for the last stocktake press <F2> and type 99999999.This will go to the last stock take
With a Stocktake docket open, right click an item on the grid to display the actions menu.
Select stock level audit to view all transactions on the item since the last stocktake. (see Stock Level Audit).
Only Open stocktakes can be viewed from the Operations >Stocktake window.
Closed Stocktakes may be reported on by selecting Stocktake from the Reports menu.